

On-Demand Content on Twitch
Utilizing on-demand content, such as Past Broadcasts (VODs), Clips, Highlights, and Collections can help grow your channel and also allow your community to watch content they may have missed otherwise.
Types of On-Demand Content on Twitch
There are a few different on-demand content types on Twitch.
Past Broadcasts (VODs)
Past Broadcasts, commonly referred to as VODs, are recordings of your past live streams. Once a broadcast is saved, you can find it in your Video Producer, where you can review it, create Highlights and Clips, or download it to repurpose elsewhere. If you don't see your past broadcasts there, check that Past Broadcast storage is turned on in your Stream Settings before your next stream.
Twitch Partners, Prime and Twitch Turbo users will have past broadcasts saved for 60 days before being deleted. Twitch Affiliates have their past broadcasts saved for 14 days. All other broadcasters will have their past broadcasts saved for 7 days before they are deleted. If you want to save your past broadcasts beyond the 7 or 60 day limits, download or export them before the 7 or 60 day window.
For streamers who stream in Dual Format or Vertical: The vertical version of your VOD will expire 7 days after your stream, after which the horizontal version will be available for the remainder of your existing retention period (60 day retention for Prime, Turbo, and Partners and 14 day retention for Affiliates). Learn more about dual format streaming.
For streamers who stream in 2K: Please note that the 2K quality version of your VOD will expire 7 days after your stream, after which the 1080p quality version will be available for the remainder of your existing retention period (60 day retention for Prime, Turbo, and Partners and 14 day retention for Affiliates). Learn more about 2K streaming.
Highlights
The Highlighter tool allows you to use segments of your Past Broadcasts (VODs) to create a new content type, called a Highlight. Highlights can serve as a highlight reel to show off your best moments to new viewers who land on your channel page. There is a 100-hour storage limit across all Highlights and Uploads, including unpublished Highlights and uploads. Read more about creating Highlights and adding stream markers here.
Uploads
Uploads allow you to upload content you may have created, saved, or edited elsewhere onto Twitch. Use the button on the right above the video list and select the file you'd like to upload from the window that opens. Uploading videos is limited to Affiliate or Partners at this time. We support file uploads using H264 video compression. There is a 100-hour storage limit across all Highlights and Uploads, including unpublished Highlights and uploads.
Channel Trailer
Channel Trailers are short videos that serve as an introduction to new viewers who visit your channel while you're offline, and are currently only available to Affiliates and Partners. Read more about channel trailers here.
On-Demand Content Storage Limits
No hourly limit.
The higher-quality version (2K or vertical) expires 7 days after your stream. The 1080p or horizontal version remains for the rest of your retention period.
Combined 100-hour storage limit. Check your current storage in the Video Producer
Enabling Past Broadcast (VOD) Storage
After you stream, you can find your broadcast in your Video Producer to review it, create Highlights and Clips, or download it. To make sure your broadcasts are saved, confirm that Past Broadcast storage is turned on in your Stream Settings.

Most Twitch Partners, Prime and Twitch Turbo users will have their past broadcasts saved for 60 days before being deleted. Affiliate broadcasts are saved for 14 days. All other broadcasters will have their past broadcasts saved for 7 days before they are deleted.
If the Store Past Broadcasts toggle is turned off, your past broadcasts won't be saved, and you won't be able to create Highlights or Clips from them. Confirm this setting is turned on before you go live to save past broadcasts.
The Store Past Broadcasts setting can only be enabled through the Creator Dashboard on web. This setting is not available in the Twitch mobile app. If you stream from your phone, you must enable this setting on web first — otherwise your mobile broadcasts will not be saved.
If your stream configurations are not set up properly or your network is unstable, streams might not save even if the Store Past Broadcasts toggle is on. To troubleshoot, use Twitch Inspector. Our help article on Broadcast Health and how to use Twitch Inspector can help you find recommended settings and requirements depending on your streaming needs and device capabilities.
Twitch Support cannot recover a broadcast that was not saved. If Store Past Broadcasts was not enabled before you went live, or if your stream did not save due to incompatible configurations, the content does not exist on Twitch's servers and cannot be retrieved. Always confirm this setting is enabled before starting your stream.
Please note that once you turn on past broadcast storage, past broadcasts will be published as VODs by default, except for VODs of streams broadcast in your Excluded Categories, and if you have disabled the setting Always Publish VODs. If you disable this toggle, or add an Excluded Category, you will need to review these VODs before publishing them.
The Video Producer
You can manage your Past Broadcasts (VODs), Highlights and Uploads using the Video Producer, and it's also where you can go to see your copyright strike status. To get there, go to your Creator Dashboard, then select Video Producer under the Content dropdown menu.
On this screen, you can use the drop-down menu on the left above the video list to filter by video type. You can also sort the videos by date created, length of video, and view count.
You can also track your Highlights and Uploads storage, as well as the number of copyright strikes on your account in the panels on the right side of the Video Producer.
How to Manage Your Videos and Storage
Download Videos
To download your videos, click the 3 Vertical Dots menu icon next to any individual video to open a menu with a wider set of options. Click download to save a video to your local device.

Twitch does not offer the option to bulk download your videos, but some third-party tools are available that allow bulk-downloads.
Please note that depending on the length of the video, it may take an extended period of time for this download to start. If your video has been muted due to the Audio Recognition system, downloading it will not provide an unmuted version of the video. For more information about appealing muted audio, please see our help article.
Export Videos
Your Twitch account can be connected to a YouTube account via your Connections page. Once your accounts are connected, you can use the Export option to upload your videos to YouTube directly from Twitch without having to download them locally. Tip: To be able to upload VODs past the 15 min upload limit on YouTube, make sure you verify your YouTube account.
Delete Videos
Use the filters to filter by content type if you are trying to delete just Highlights or Uploads to free up storage space. You can sort your videos by least viewed, date created, and length of video to help decide which content may free up the most space.
When deleting videos in the video producer, you'll be able to see how many hours of storage you will regain by deleting selected content before you hit delete.


Unpublish or Publish Videos
All VODs are published by default if past VOD storage is enabled. Unpublishing a video will make it publicly inaccessible.
You can unpublish or publish individual videos using the 3 Vertical Dots menu. To unpublish or publish videos in bulk, select the videos you want to manage using the check boxes on the left side of the video producer and then select unpublish or publish.
Reminder: Both Published and Unpublished Highlights and Uploads count towards your storage limit. Unpublishing Highlights or Uploads will not free up storage space. You must delete Highlights or Uploads to free storage space.
Edit
Clicking the Edit option from the 3 Vertical Dots menu will bring up the edit panel. Clicking on a specific video listing will also bring up the edit panel. You'll have the option on this panel to edit the Title, Description, Language and Category for a video. You can also remove tags, adjust the video thumbnail or edit the permissions for who can view your video.
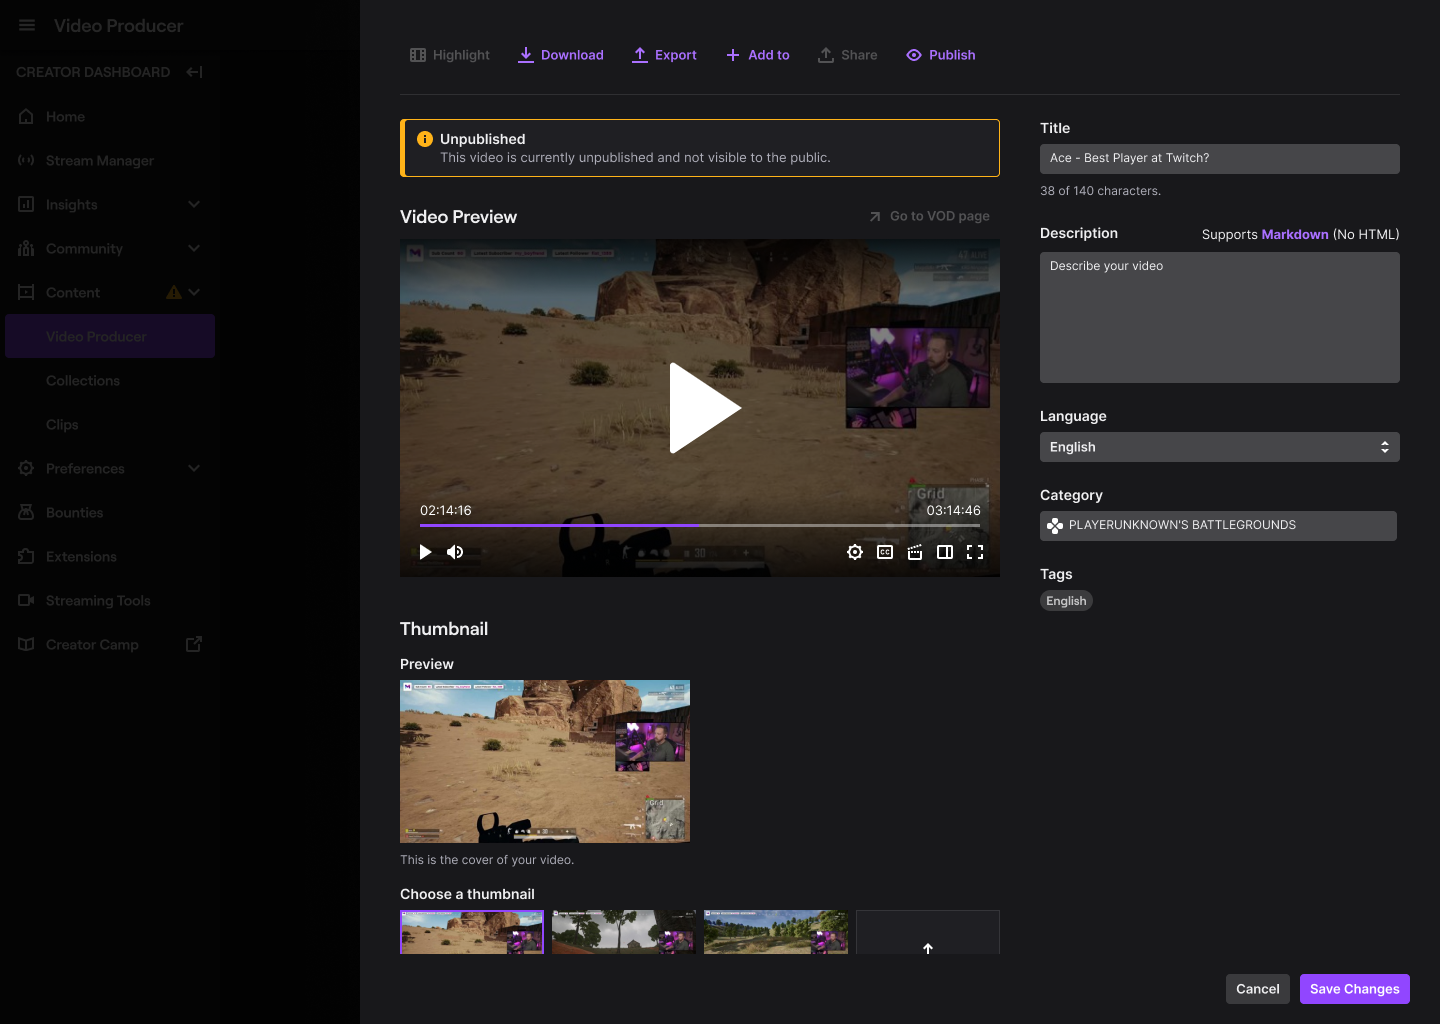
After you've finished editing your video, click Save Changes. Clicking Cancel will revert all changes.
Add to
Clicking on Add to will bring up another two options:
Collection
Collections are playlists which let you organize and show off your best work. You can create Collections for any set of videos you want to highlight on your channel, whether it is a general introduction reel, a recurring show, each game you stream, or creative projects that span across multiple streams on your channel. For more information about collections and making a collection, please see our help article.
Rerun Queue
Reruns are non-live content that you can play on your channel. To broadcast a Rerun, you can capture and stream your VODs from your streaming encoder of choice. Make sure to let your viewers know when you're broadcasting pre-recorded content by following these three steps:
- Select the "Rerun" checkbox in the Edit Stream Info panel
- Add "[Rerun]" to the beginning of your Stream Title
- Add "[Rerun]" to the beginning of your Go Live Notification copy

Selecting the Rerun checkbox adds a Rerun tag to your stream. Failing to properly label your stream as a Rerun can damage community trust. Without the Rerun label, your viewers expect to engage with a live streamer. Streamers who are properly broadcasting a Rerun will display a Rerun label on their channel page.
Highlight
This option is available on Past Broadcasts. Selecting it will bring you to the Highlighter. Here, you can create Highlights. You may not be able to create new Highlights if you are at or close to the 100-hour storage limit. Delete Highlights or Uploads to free up space to make more Highlights. For more information on creating Highlights, please see our dedicated help article for Highlights.
Watch
Click this to watch your published VODs in a new tab. You can also click directly on the row for a specific VOD to watch it in your Video Producer. Both published and unpublished VODs can be easily watched right inside your Video Producer.
Video Chapters
When you change the category of your stream while live, we automatically save that information for you as chapters. On playback, viewers can jump to the timestamp of your category change. There is no way to modify category change information after they are created.

